A Simple iOS App in SWIFT Xcode to get Weather API (super simple)with a Counter Example in Python

We want to create a simple illustration to get API data. First we will do it with just Python. Then, just for fun, we use Xcode to create an APP doing the same.
We are skipping a lot of error correction so we can illustrate how to get data from a common API in as few lines of codes as possible.
Data Source:
We use OpenWeather to source our weather data. OpenWeather is simple to use and you can get free API. https://openweathermap.org
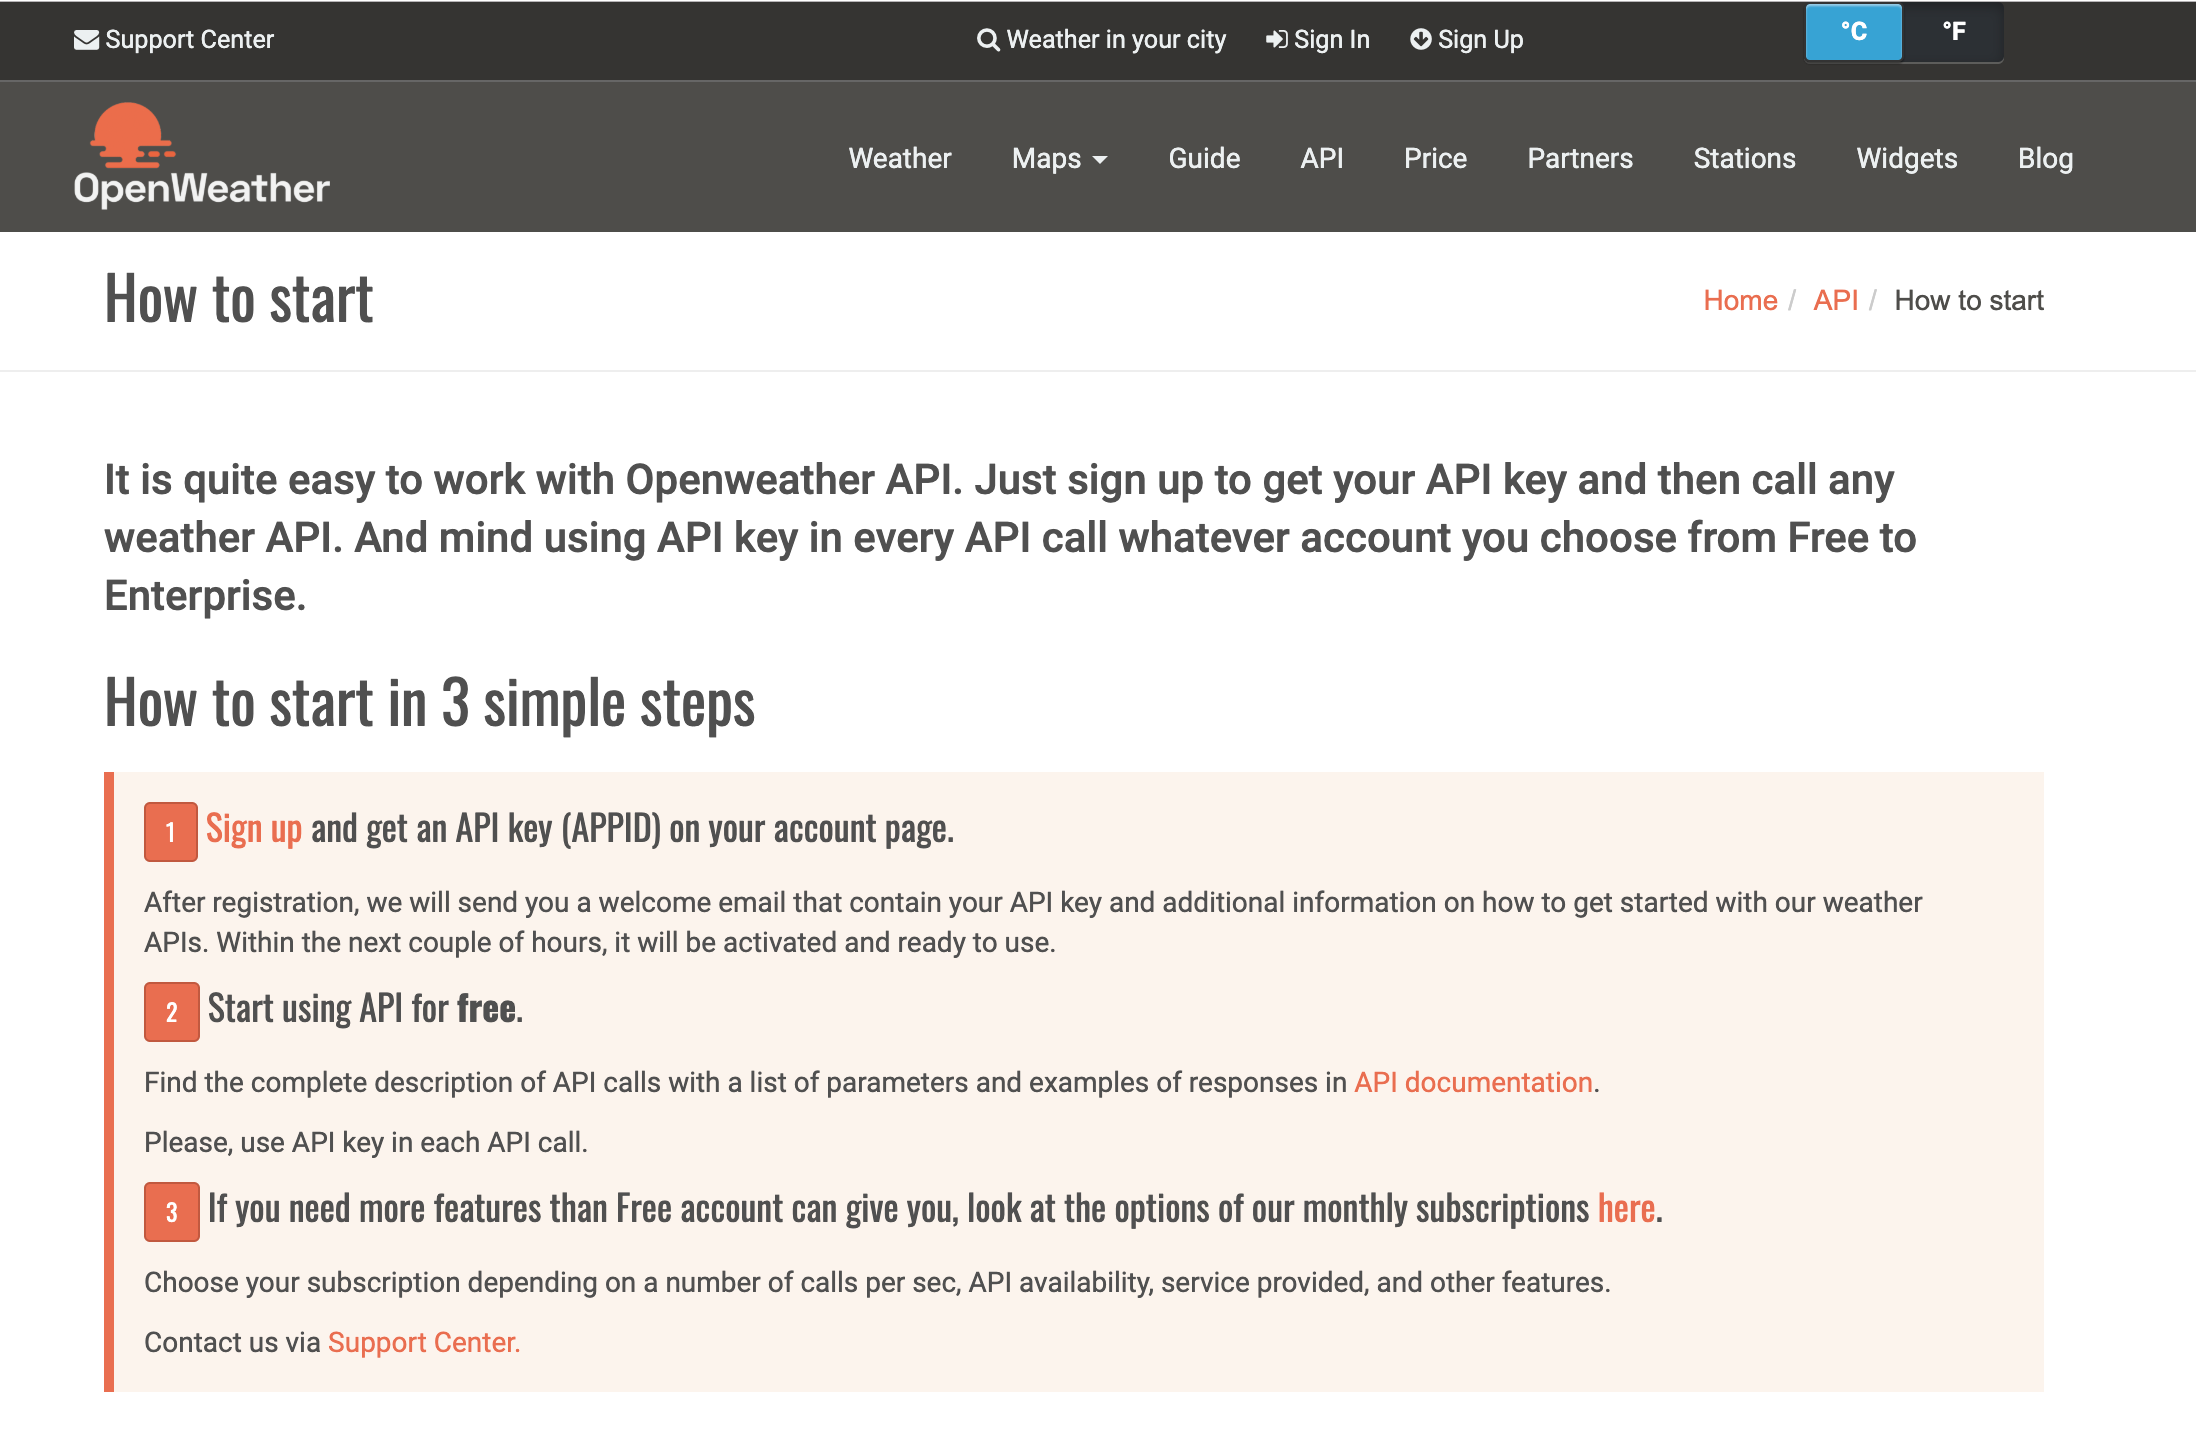
To get the API key, you will need to register. Simple follow the steps on https://openweathermap.org/appid
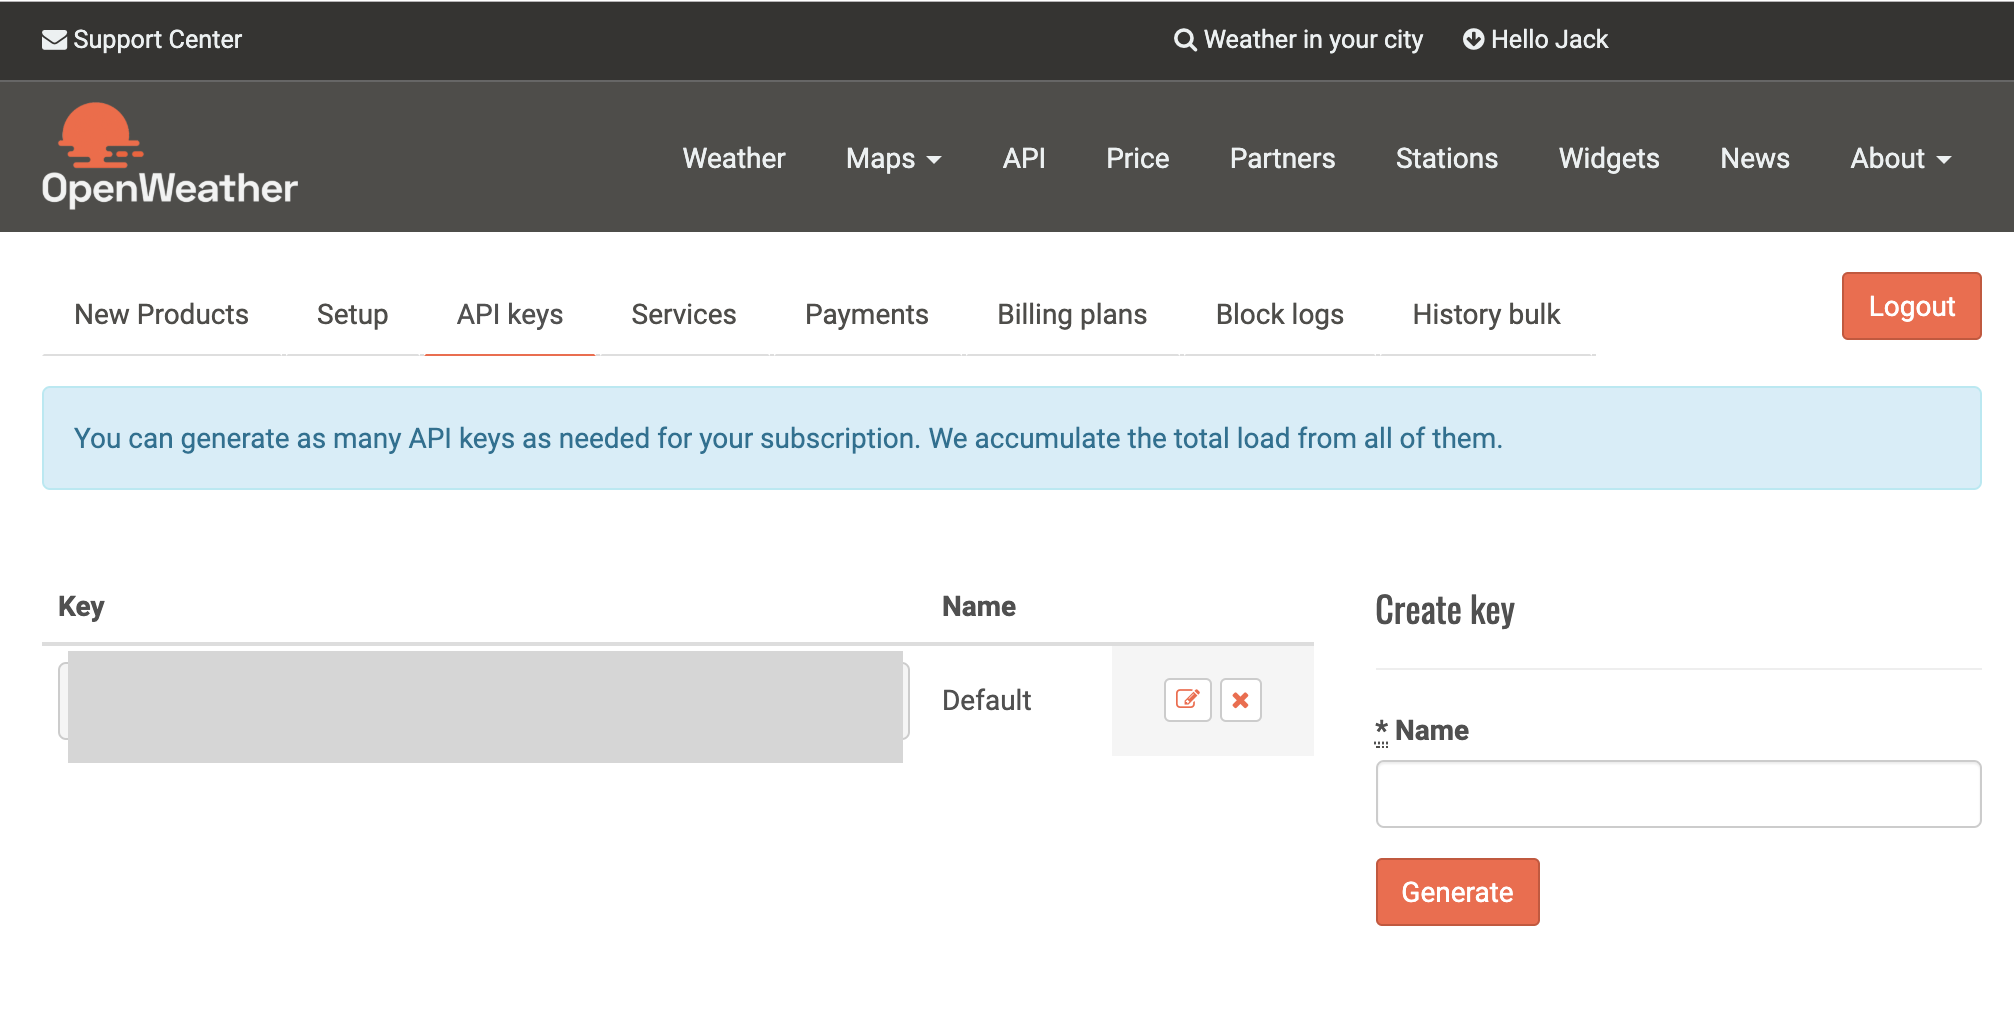
Once you have followed the instruction, you can find out the API keys of your own. It is pretty cool that you can generate multiple ones.
You can check your API key at https://home.openweathermap.org/api_keys
For instance, here if you want to get the weather data for Hong Kong, you can enter: http://api.openweathermap.org/data/2.5/weather?q=HONG%20KONG&APPID=yourOwnAPIKey&units=metric
I have added at the end of the key &units=metric to get metric data such as temperature in Celsius, but that is not mandatory. The place where it says yourOwnAPIKey is where you enter the string representing your API key.
Have some fun. Open a browser and enter the http address in the browser. The data coming back can be difficult to read, but they are actually pretty neat.
Without processing, on your browser, you will see something like this

Don’t worry, these are JSON data. You can open one of many JSON browser to get a better read of the data. You can use either https://jsonformatter.org/json-viewer or https://jsoneditoronline.org/
If you use jsonformatter, you can just enter the http:// address through the Load Data button in the middle.
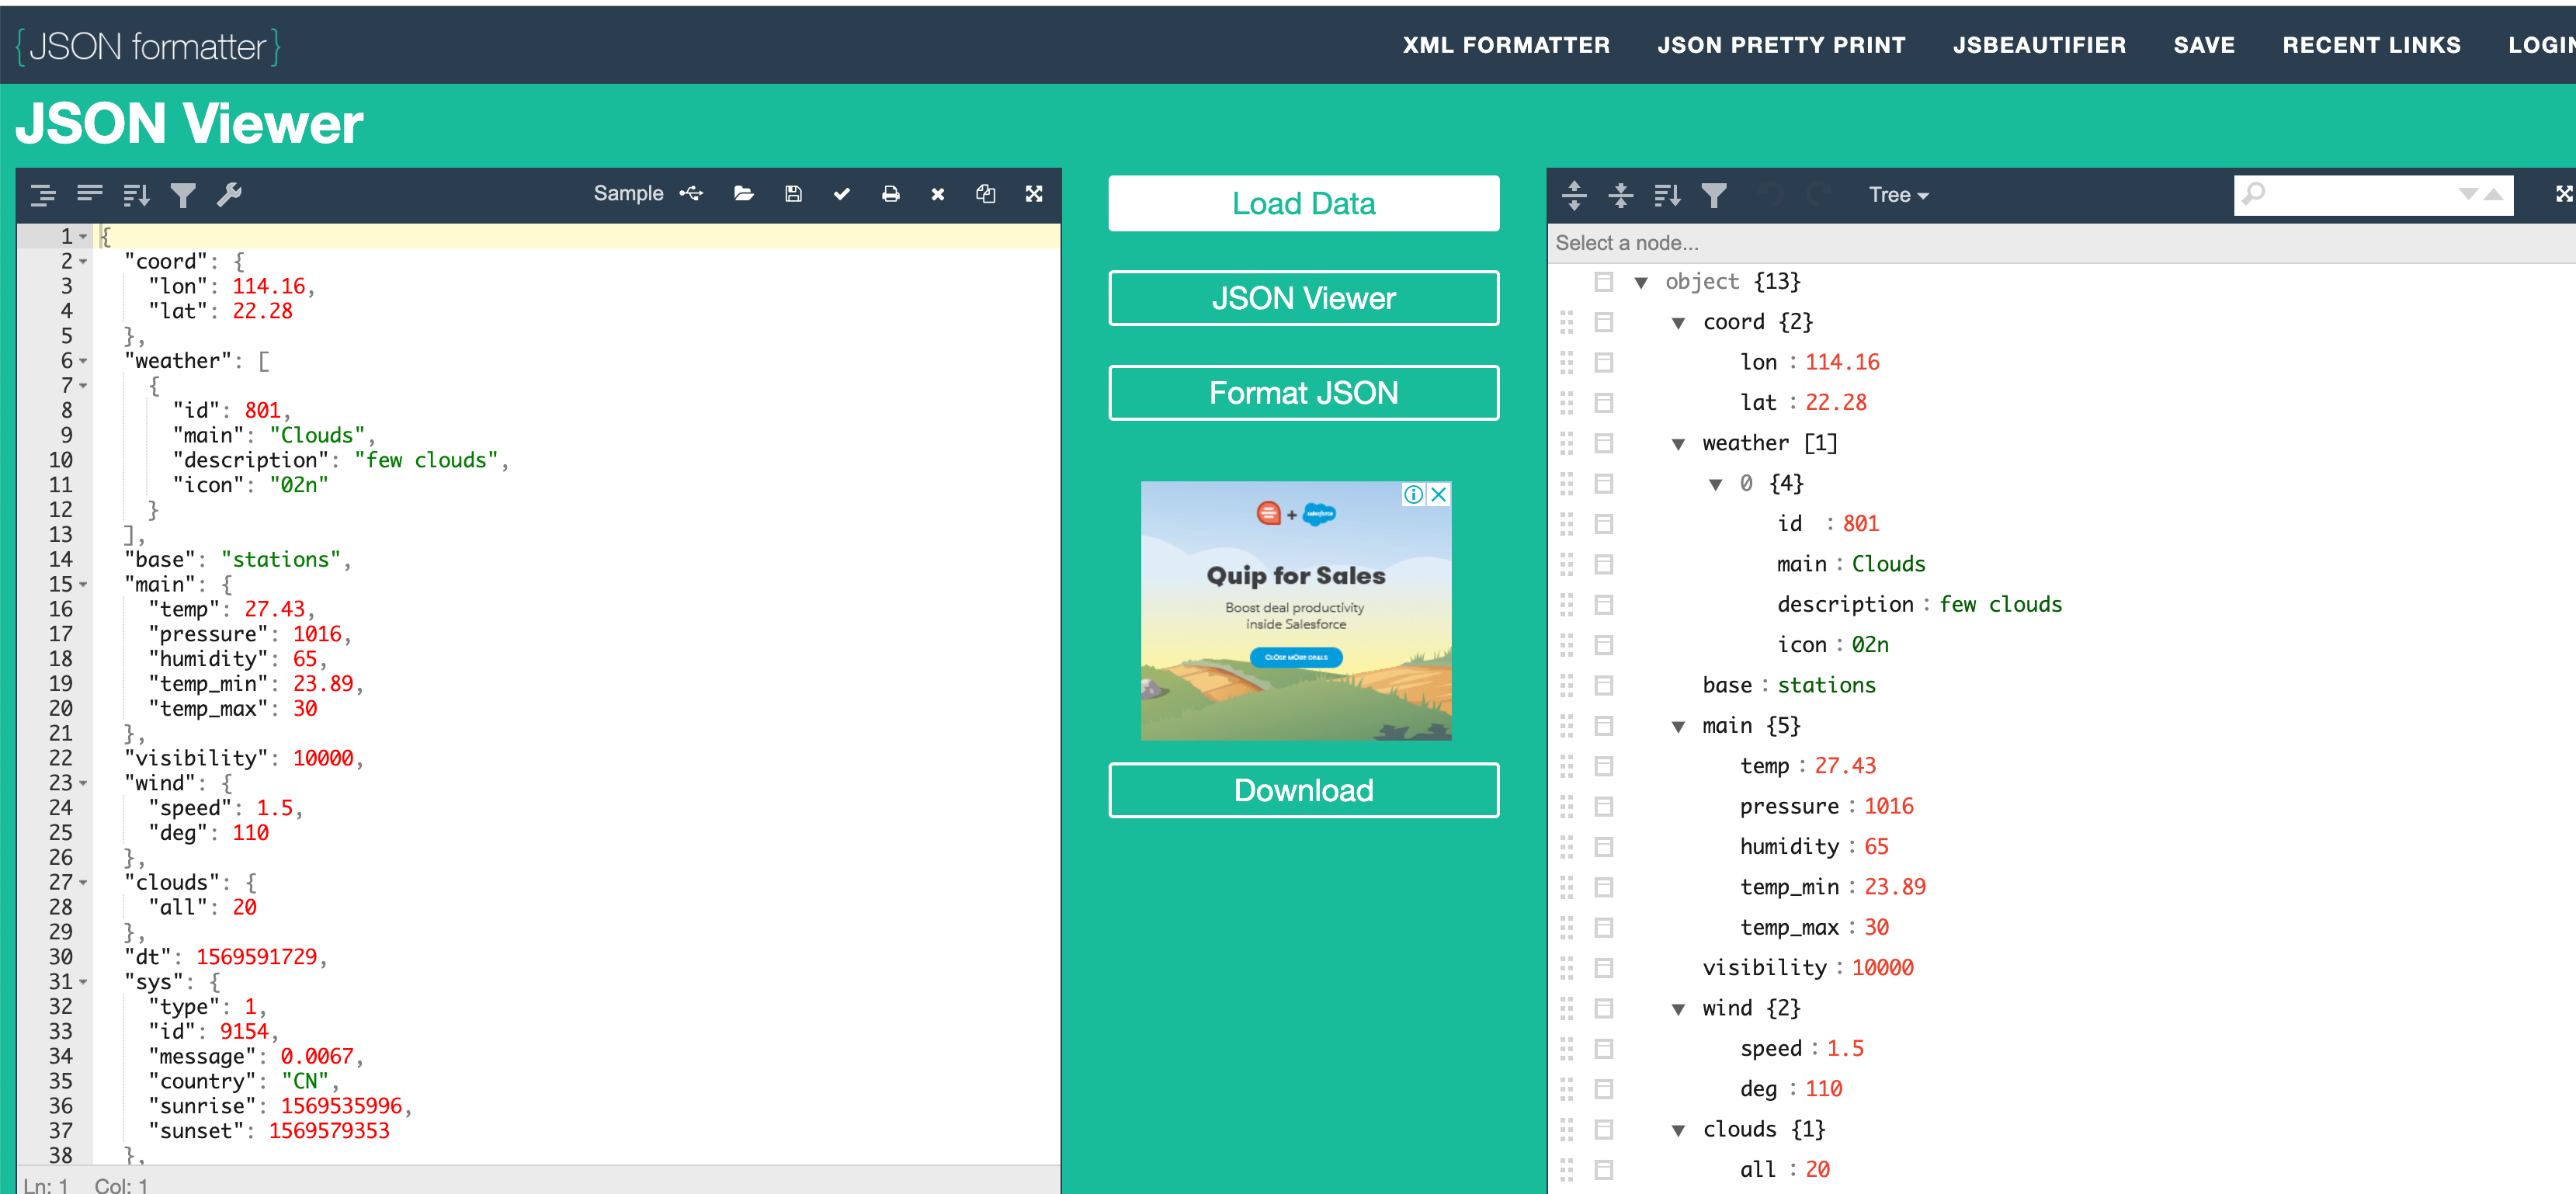
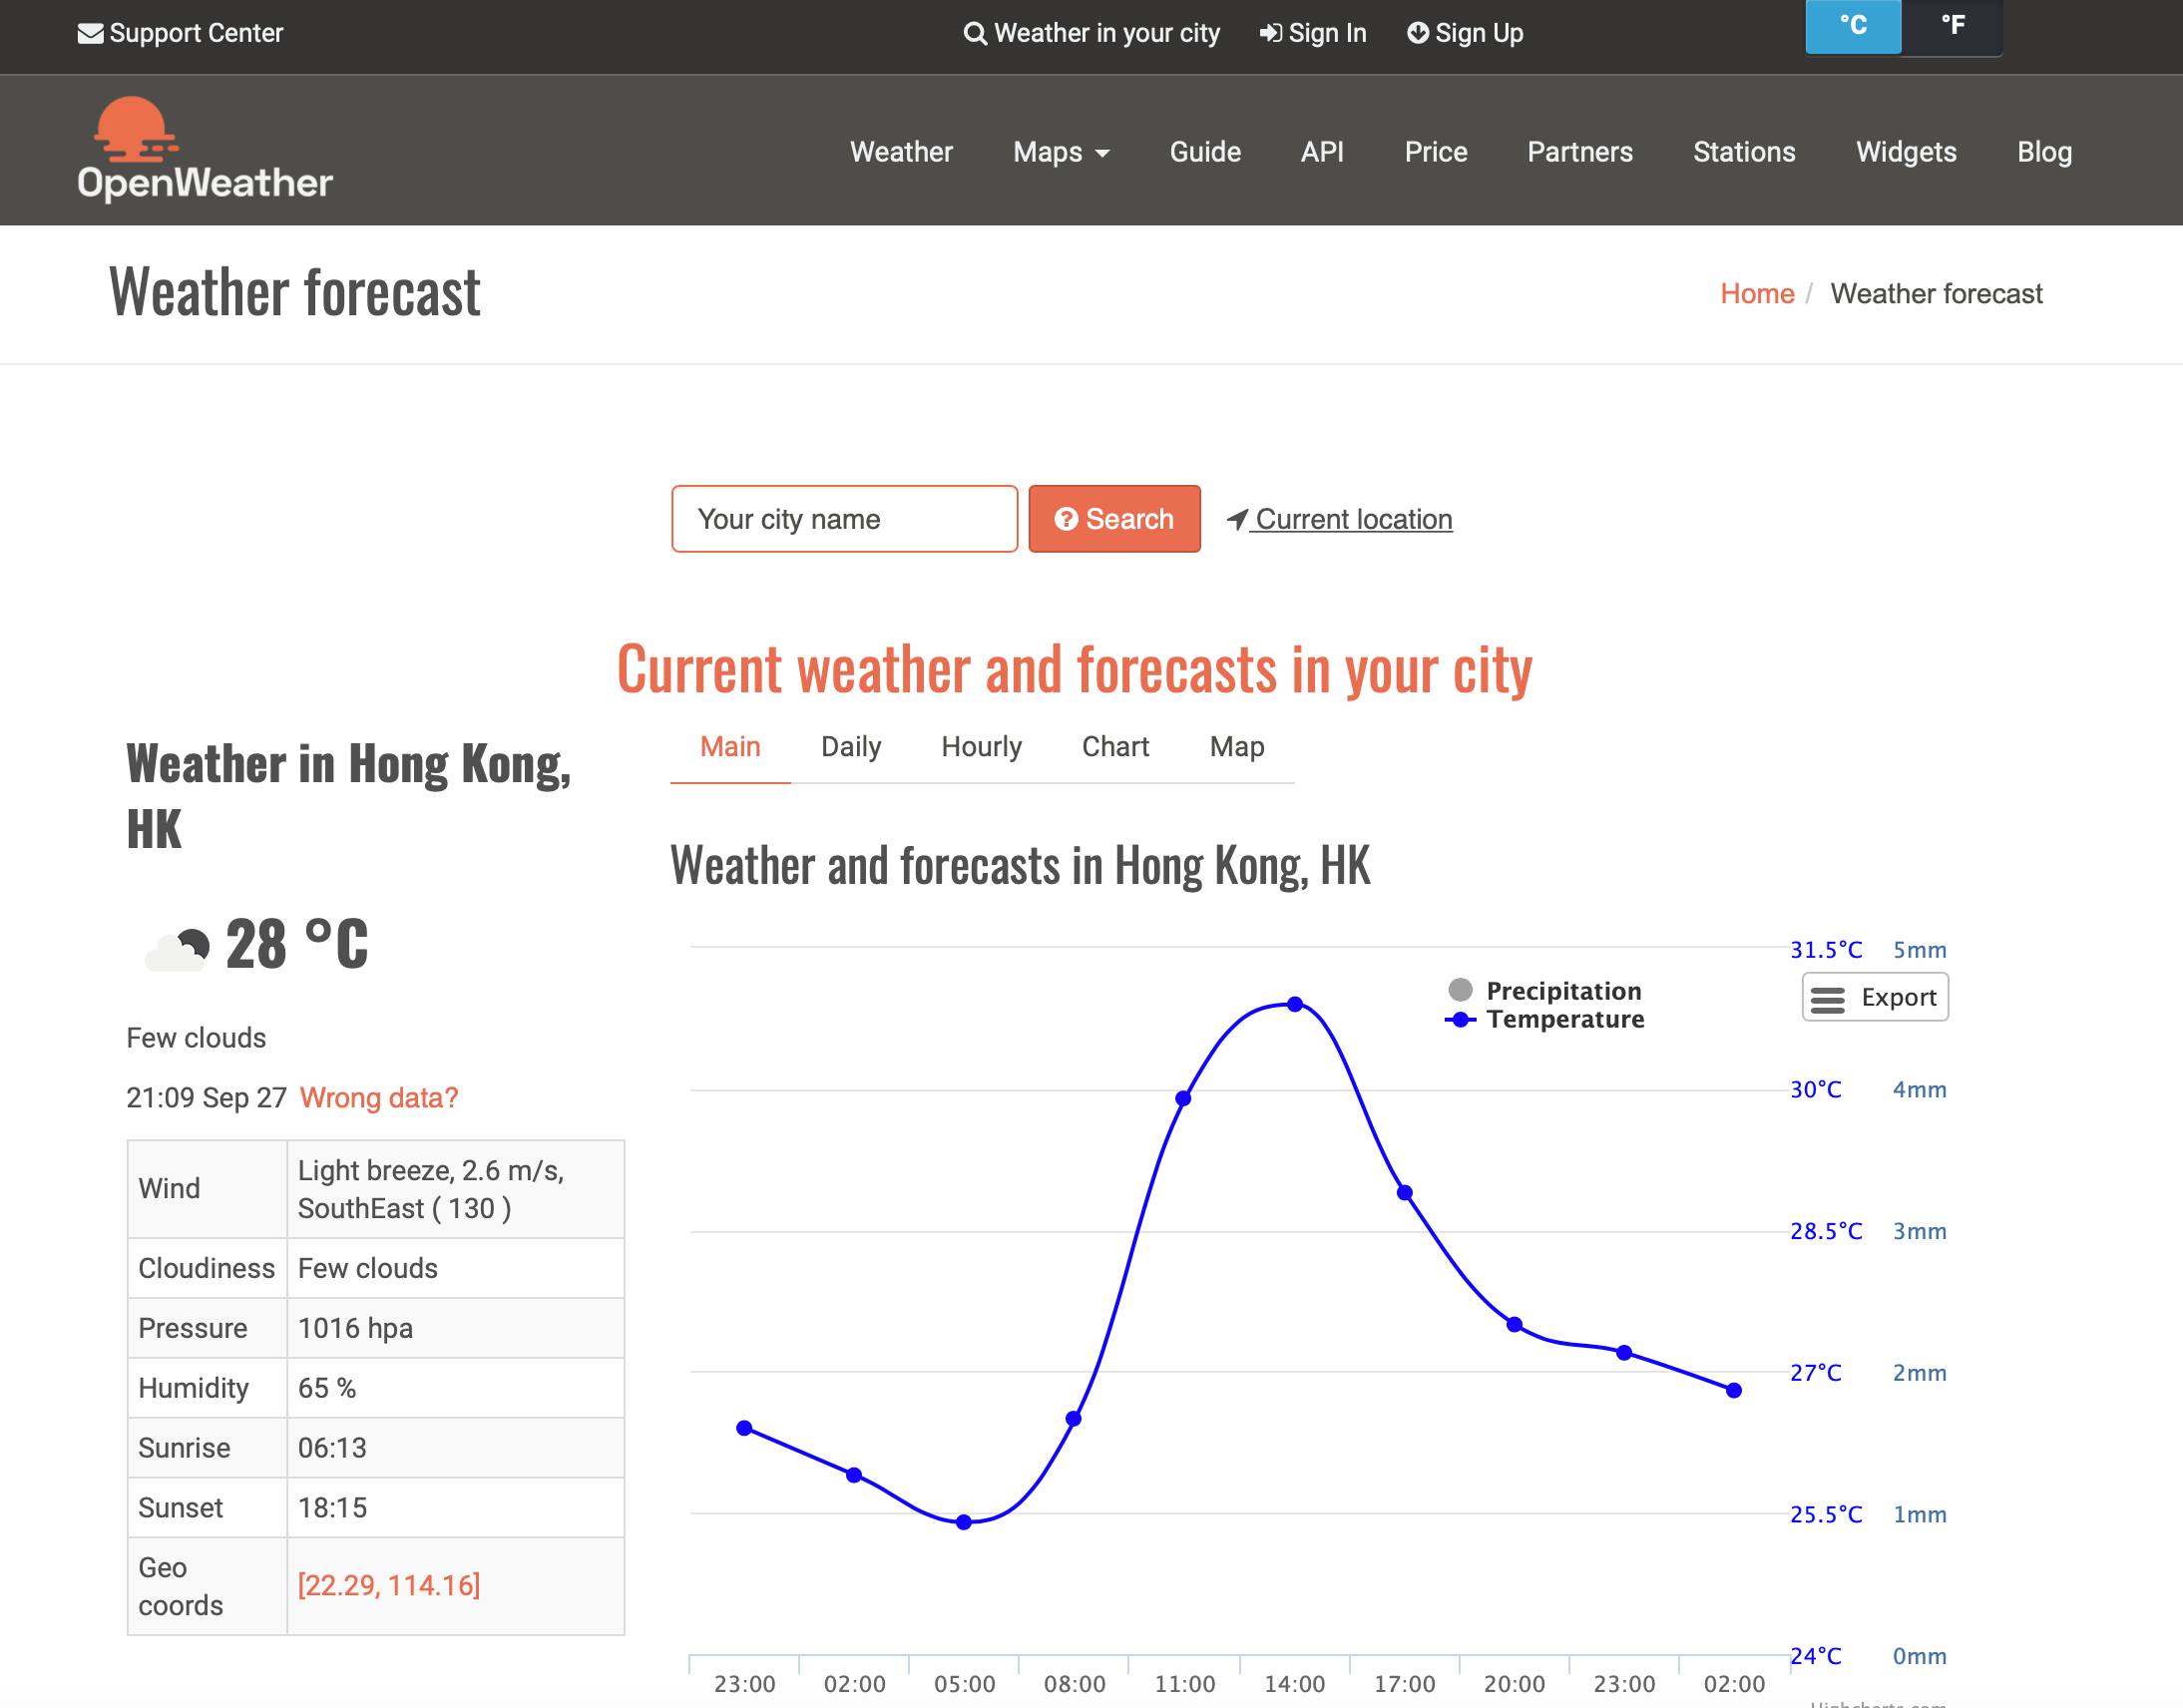
You can now more clearly see what you are getting back from OpenWeather.
Doing it through Python
Here you can use any of your favorite Python compiler or code editor. But, to make things really simple, we can also try it in the Google Colab which runs nicely on a browser (Chrome is better for this).
Just go to the browser and type Google Colab. You can then start a new Python3 session

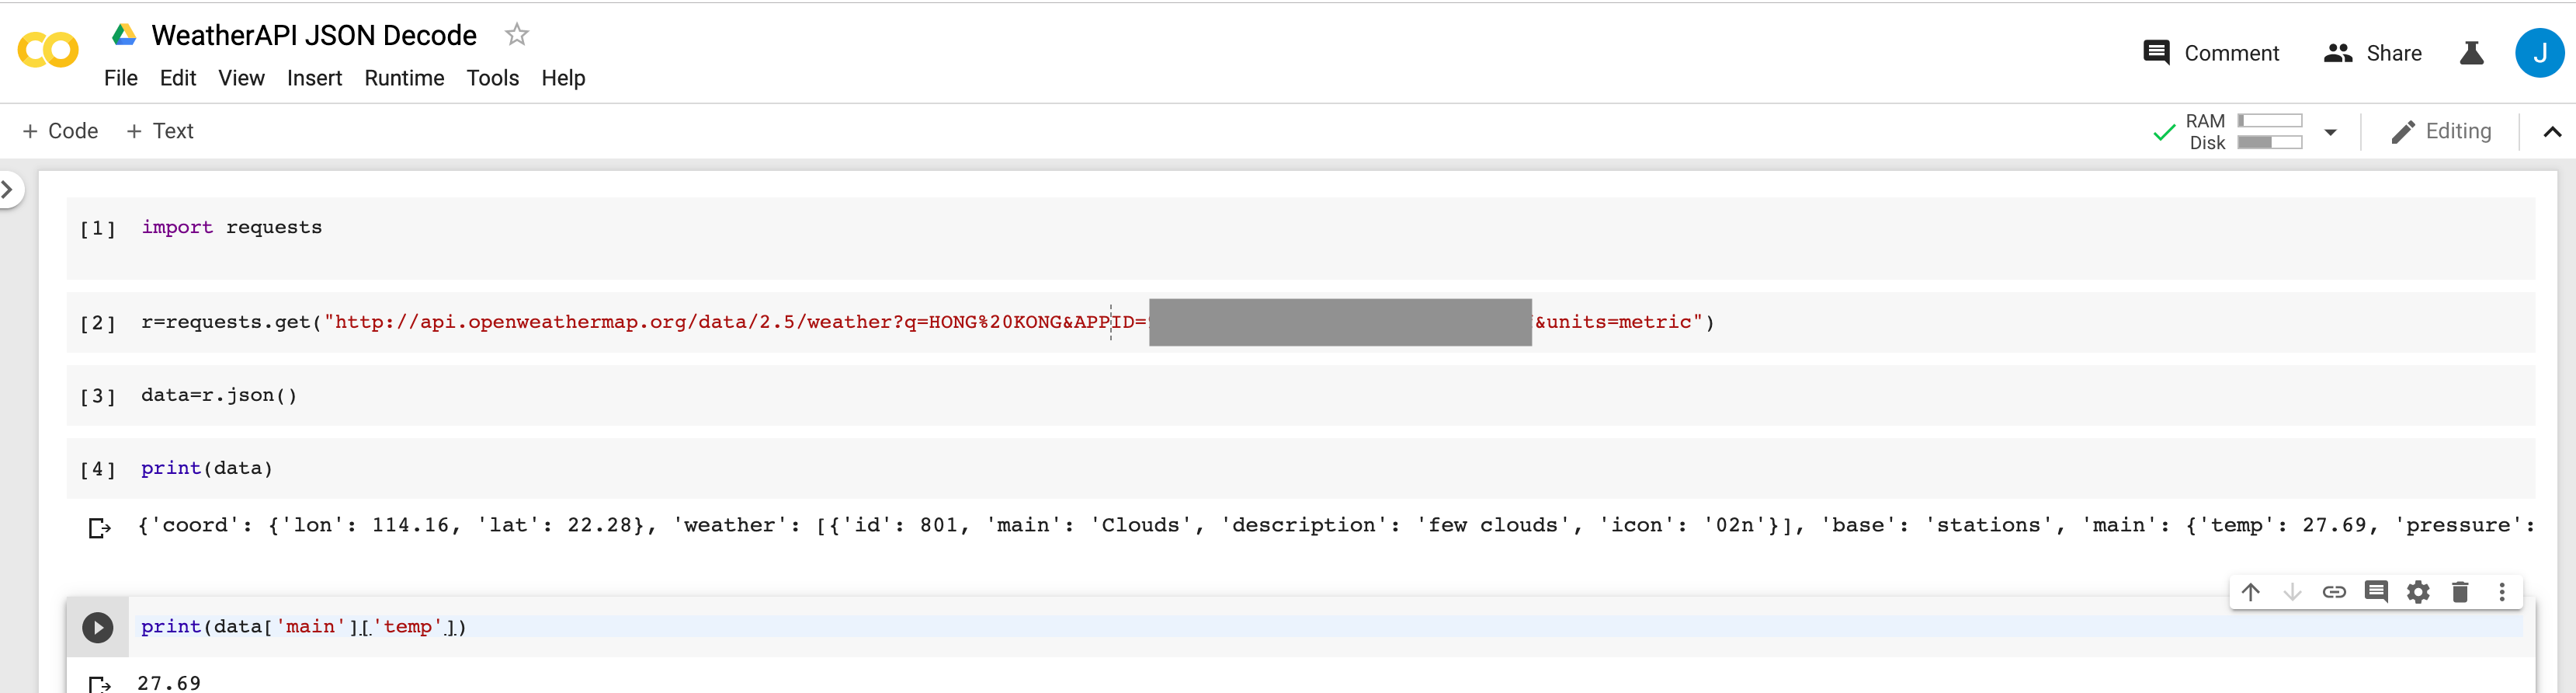
Then just type in the code as shown below
Or if you are using other editor, here is the code
import requests
r=requests.get(“http://api.openweathermap.org/data/2.5/weather?q=HONG%20KONG&APPID=YourOwnAPIKey&units=metric")
data=r.json()
print(data)
print(data[‘main’][‘temp’])
In the print(data) line, after you execute it, you will see all the data printed out. The entire json output from invoking the OpenWeather API is passed to the data through the r.json() command . That is so neat!
You can play with it and print out other data. Here I just specify the temperature which is stored in the nested structure under “main” and under “temp” within “main”
Do it in Xcode and Develop an iOS APP
We can also play with it within an iOS environment, say, by creating an APP.
Unfortunately, by definition, if you are going to start an iOS development, you can only easily do it with a Mac.
Step 1: Open a new directory through your Terminal
Step 2: We need to install a few dependencies. Here we install them using CocoaPods https://cocoapods.org/
Edit a file (using a simple vi editor or any text editor) called Podfile
platform :ios, ‘10.0’
inhibit_all_warnings!
use_frameworks!
target ‘WeatherApp’ do
pod ‘Alamofire’, ‘~> 5.0.0-rc.2’
pod ‘SwiftyJSON’
end
Here, we are invoking Alamofire version 5 to help us do the “GET” the data from the URL.
We are also installing SwiftyJSON to later on use it get parse the JSON data.
Notice that since verison 5, Alamofire has changed some syntax. (You should be able to just say pod ‘Alamofire’ without specifying the ~ at the end if you are just using the latest version.
After you have edited the Podfile, then type
pod install — repo-updateon your terminal
This basically gets the Podfile and install all the necessary Pods for your Swift Xcode.
Step 3: In the User interface, I have drawn a text box (to display the final result) and a button (to trigger the command to get data from OpenWeather)
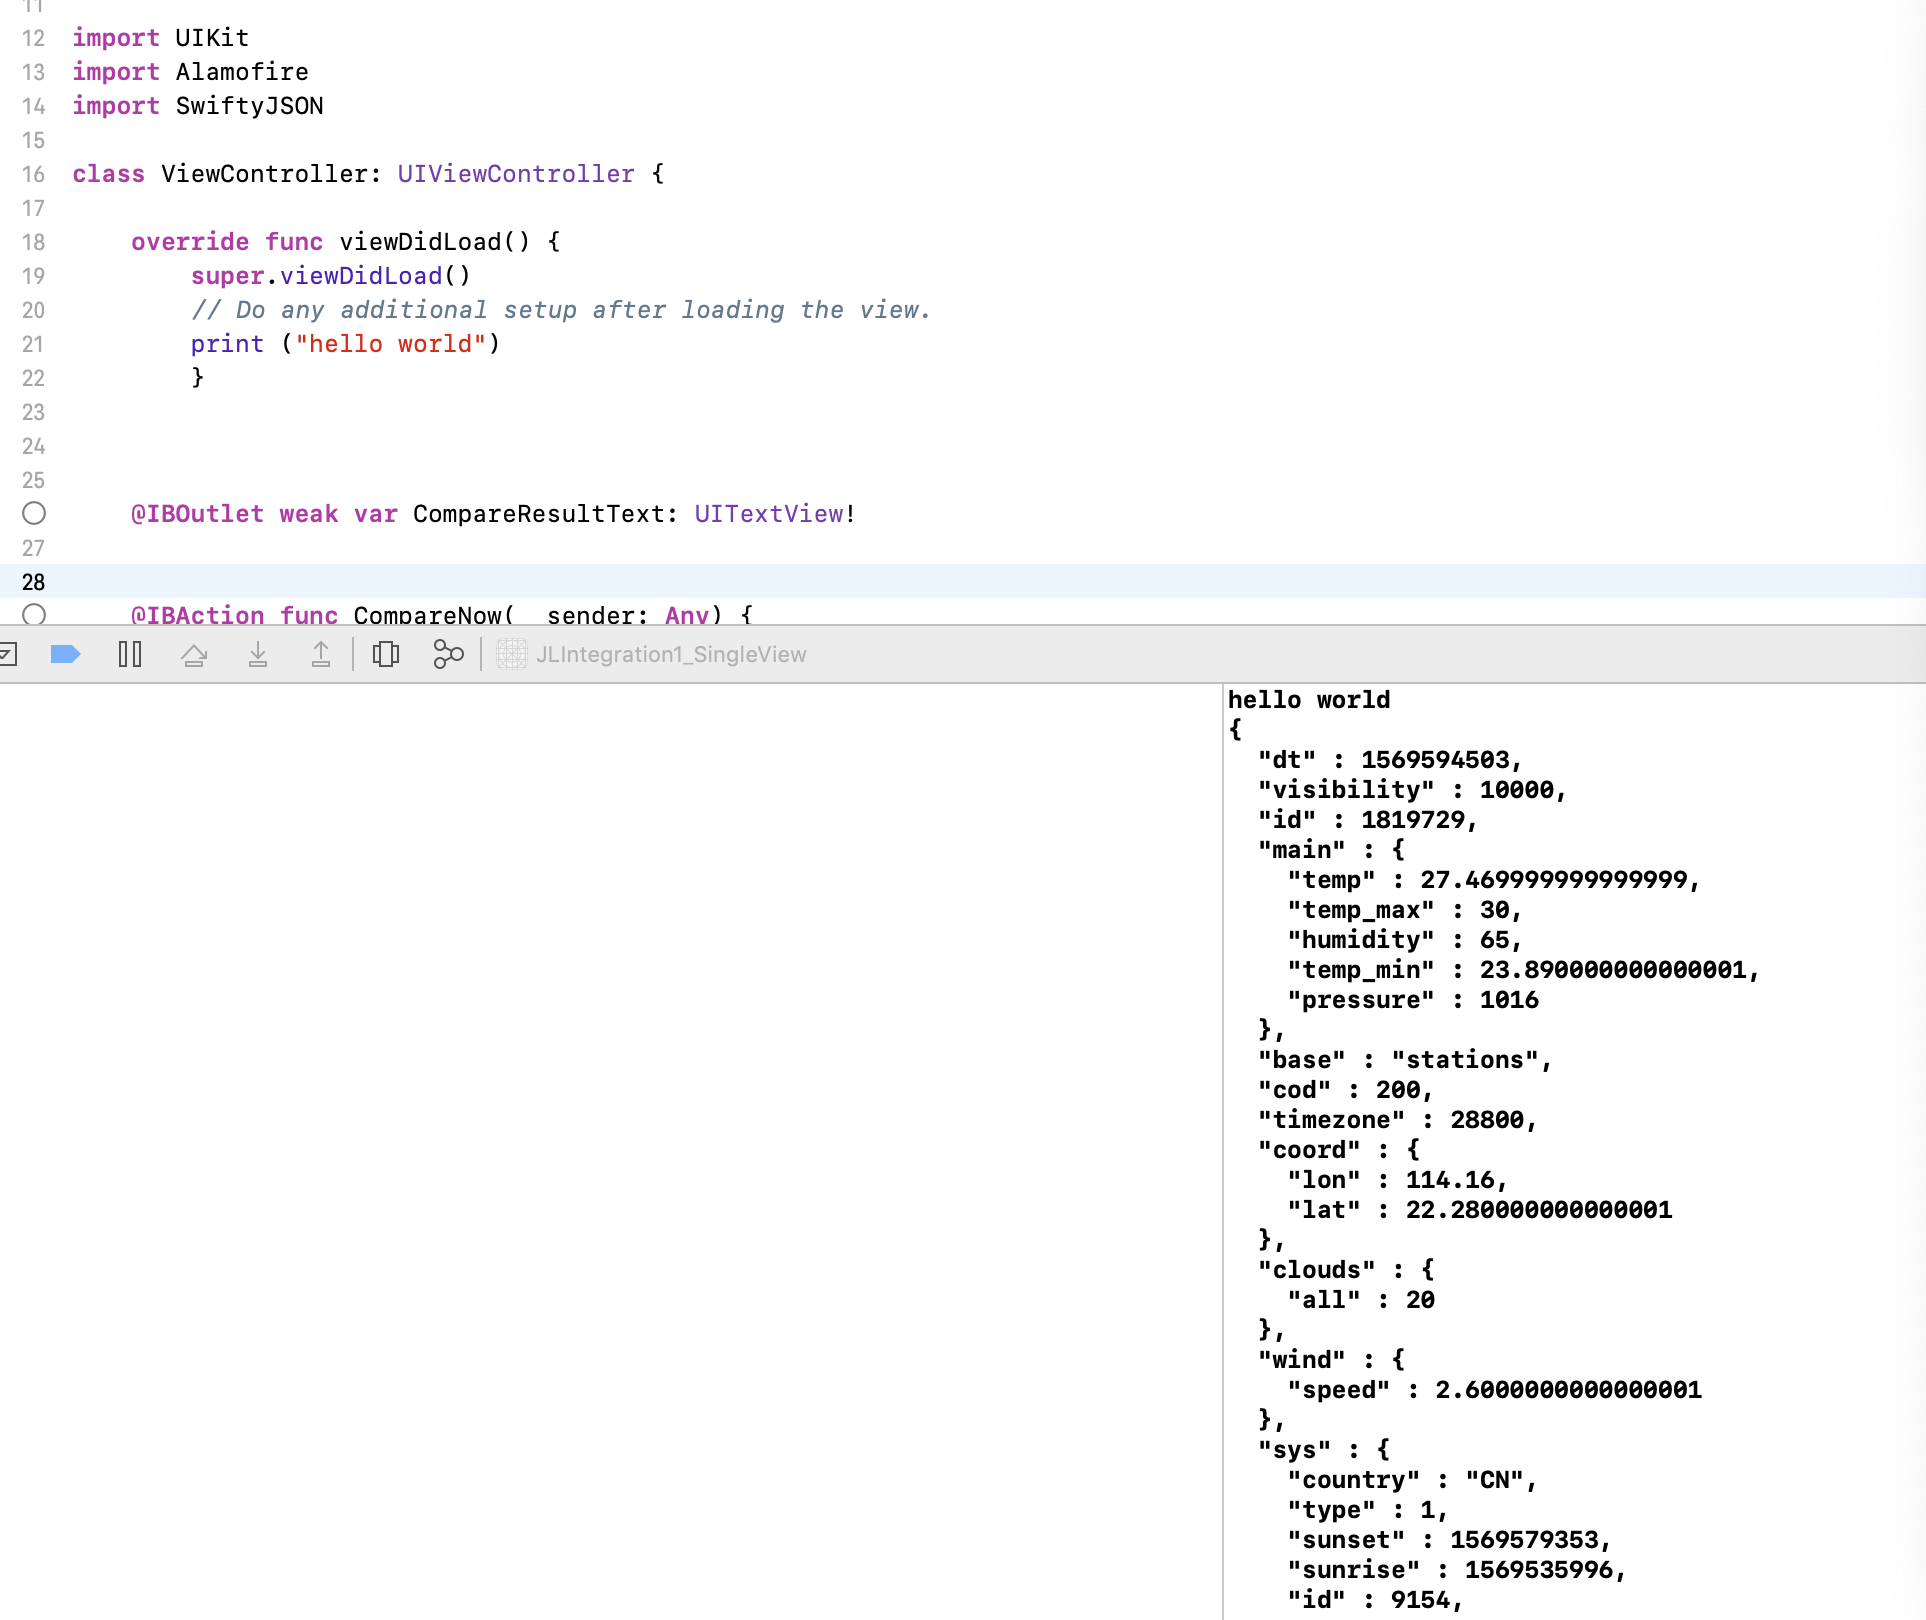
Step 4: My ViewController.swift file (simple) looks something like this
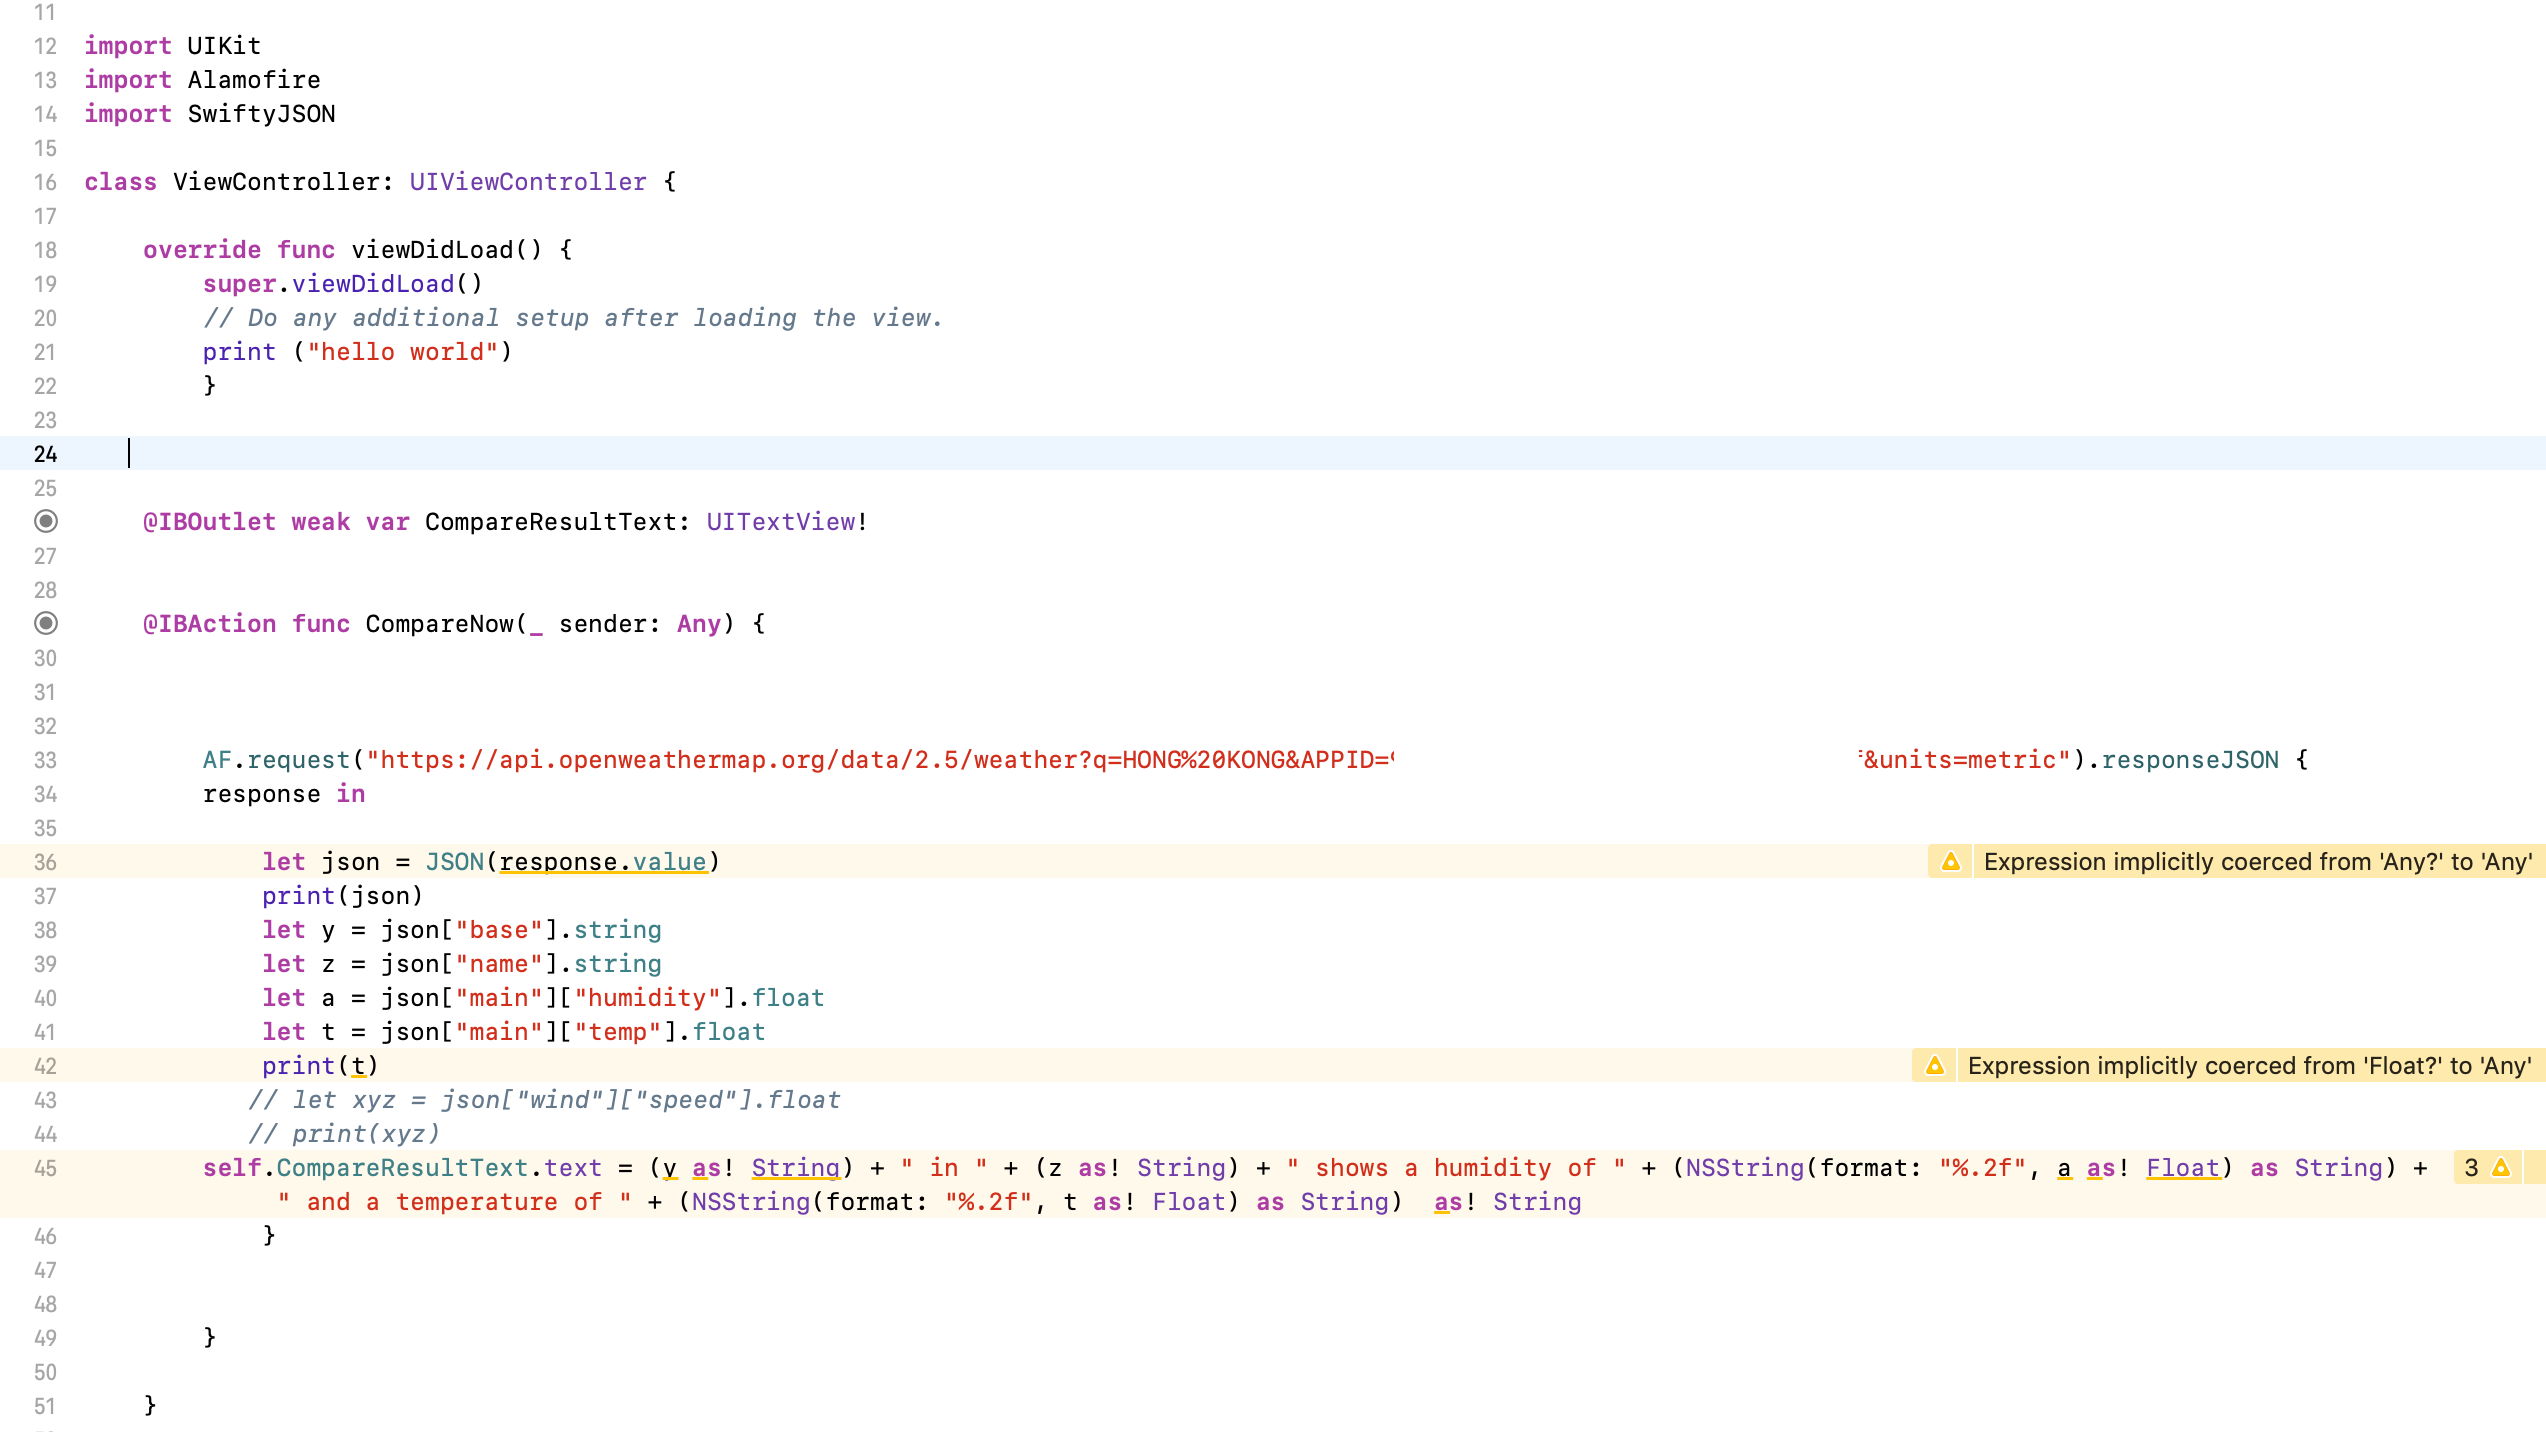
The URL GET function is done though AF.request within a Button. You can simply create a button in the Main.storyboard and copy the code above. Once you press a button, you will get the data. (Note that: you need to make sure that AF.Request is getting a secured http so it must be https://)
You will need to do a few type casting to get the format right. Floating point is recasted as string to show up in the Text View.
That’s it. Have fun.
As said, this is just a quick and dirty way to play with the OpenWeather API. No error code and the name of the variables are just silly.
P.S. When you run your Xcode, you will get a glimpse of the JSON output in the Xcode window. It is always useful to look at them and see if that is what you expect.